Introduction: Why Is My Kitchen Faucet Leaking from the Base?
A leaking kitchen faucet can be both frustrating and costly. When water pools around the base of your faucet, it not only creates a mess but can also lead to significant water damage if left unattended. A leak from the base of your faucet is usually a sign of internal component wear or a loose connection. This guide aims to provide a thorough breakdown of how to diagnose, troubleshoot, and repair a kitchen faucet leaking from the base.
Understanding the root cause of the problem and following a systematic repair process can help you avoid unnecessary replacements and extend the lifespan of your faucet. Let’s delve into the causes and solutions for a kitchen faucet leaking from the base.
Understanding the Common Causes of a Kitchen Faucet Leaking from the Base
A faucet leaking from the base is often due to minor yet critical internal issues. Identifying the underlying cause is crucial for an effective repair. Below are the most common reasons your kitchen faucet might be leaking from the base:
1. Worn-Out O-Rings or Seals
The most common culprit of a kitchen faucet leaking from the base is worn-out O-rings or seals. These small rubber components are responsible for preventing water from seeping out. Over time, these rings deteriorate due to constant usage, exposure to water, and mineral buildup. When they crack or wear out, water begins to escape from the base.
2. Loose Faucet Parts
Faucet components, especially the nuts and screws securing the handle and other parts, can become loose over time. Vibrations from regular use can cause these fittings to loosen, leading to leaks at the base. A simple tightening of these parts may solve the problem.
3. Damaged Cartridge or Valve Assembly
The faucet cartridge or valve assembly controls the flow and temperature of the water. If this component is damaged or deteriorates, it can lead to water leaking from the base of the faucet. Replacing the cartridge is often necessary if this is the cause of the leak.
Tools and Materials You Need to Fix a Leaking Kitchen Faucet
Before you start, make sure you have the right tools and materials ready. Having everything on hand will make the repair process smoother and quicker.
Adjustable wrench
Phillips and flathead screwdrivers
Hex (Allen) wrench
Replacement O-rings or seals
Replacement faucet cartridge (if necessary)
Plumber’s grease
Towels and bucket
Pipe cleaner or vinegar (for cleaning buildup)
Tools and Materials You Need to Fix a Leaking Kitchen Faucet
Step-by-Step Guide: How to Repair a Kitchen Faucet Leaking from the Base
Fixing a kitchen faucet leaking from the base is a task that most homeowners can manage without professional assistance. Follow this detailed step-by-step guide to address the issue effectively.
1. Shut Off the Water Supply
Before disassembling your faucet, locate the water shutoff valves beneath your sink and turn them off. This prevents any accidental flooding while working on the faucet. After shutting off the valves, open the faucet to release any remaining water pressure.
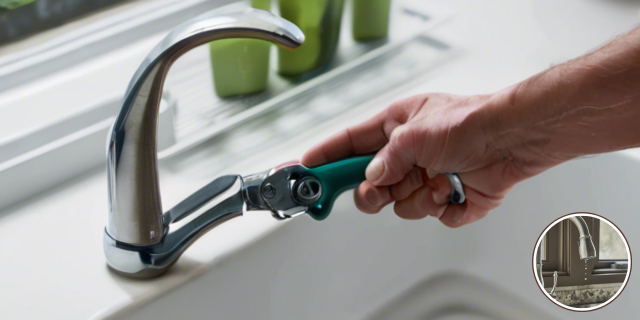
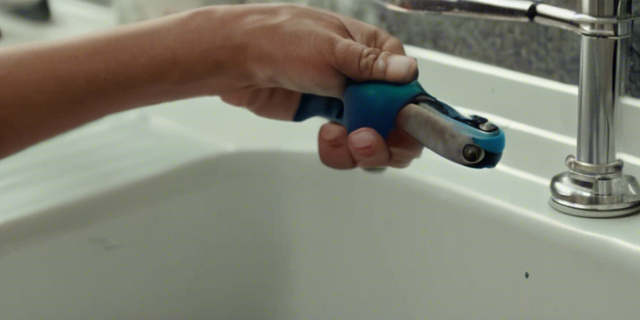
2. Disassemble the Faucet Handle
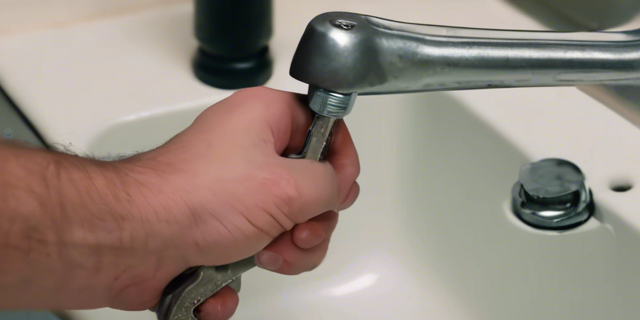
The method of removing the handle depends on the faucet type. Typically, you’ll need a hex wrench to unscrew the handle. Look for a set screw beneath or at the back of the handle. Once you remove the screw, carefully lift the handle to expose the cartridge or valve assembly.
3. Inspect and Replace the O-Rings and Seals
Once you have access to the internal components, examine the O-rings and seals. These rubber components are usually found around the cartridge or at the base where the faucet meets the sink. If they appear cracked, brittle, or worn out, replace them. Apply plumber’s grease to the new O-rings before installation to ensure a watertight seal.
4. Check the Cartridge or Valve and Replace If Necessary
If replacing the O-rings doesn’t stop the leak, the cartridge or valve assembly might be the problem. Carefully remove the cartridge and inspect it for damage or wear. If it’s faulty, replace it with a new one that matches your faucet model. Reinstall the cartridge, ensuring it is securely seated.
5. Reassemble the Faucet and Test for Leaks
After replacing the necessary components, reassemble the faucet by following the steps in reverse order. Once everything is back in place, turn on the water supply and test the faucet. Check for any leaks around the base. If the leak persists, double-check the tightness of your fittings and ensure all parts are correctly installed.
Preventative Maintenance Tips for Kitchen Faucets
Preventing future leaks is all about consistent maintenance. Here are a few tips to keep your faucet in optimal condition:
Regularly inspect and clean the aerator to prevent buildup.
Periodically check the O-rings and seals and replace them as needed.
Use plumber’s grease when reinstalling parts to prevent leaks.
Avoid overtightening faucet parts, which can damage seals and threads.
If you notice stiffness in the handle, it could be a sign of worn-out internal parts—address it early to prevent leaks.
When to Call a Professional Plumber for a Leaking Kitchen Faucet
While many kitchen faucet leaks can be fixed with basic tools and a little know-how, there are times when it’s best to call in a professional plumber. Consider hiring a pro if:
The leak persists after replacing O-rings, seals, or the cartridges.
The faucet is old, and multiple parts are failing simultaneously.
You’re unsure how to disassemble or reassemble your faucet.
The leak is causing significant water damage beneath your sink.
Professional plumbers have the experience to diagnose complex issues and can save you time and effort.
FAQs
1. Can a leaking faucet increase my water bill?
Yes, even a minor leak can lead to significant water wastage over time, increasing your water bill. A faucet that drips once per second can waste over 3,000 gallons of water annually.
2. What causes a kitchen faucet to leak from the base when turned on?
A faucet leaking from the base when turned on is typically due to worn O-rings, seals, or a faulty cartridge. These components wear out over time, leading to leaks during operation.
3. How often should I replace faucet O-rings?
Faucet O-rings should be inspected every few years, especially if you notice stiffness in the handle or minor leaks. Replacing them as soon as they show signs of wear can prevent bigger issues.
4. Is it better to repair or replace a leaking faucet?
If the faucet is relatively new and the leak is caused by minor issues like worn O-rings or a faulty cartridge, repair is often the best option. However, if the faucet is old and multiple components are failing, replacement might be more cost-effective in the long run.
5. How long does it take to fix a leaking kitchen faucet?
On average, repairing a leaking kitchen faucet can take between 30 minutes to an hour, depending on the complexity of the issue and whether any parts need to be replaced.
Conclusion: Resolving Your Kitchen Faucet Issues Efficiently
Fixing a kitchen faucet leaking from the base is a straightforward process when you understand the root causes and follow a step-by-step approach. By addressing common issues like worn O-rings, loose fittings, or faulty cartridges, you can restore your faucet’s performance and prevent water damage. Regular maintenance is key to avoiding future leaks, but if the problem persists, don’t hesitate to seek professional assistance. With this guide, you’re well-equipped to tackle a leaking kitchen faucet and keep your sink area dry and functional.